Long long ago when we built our house we thought it would be cool to one day have a greenhouse. We had a ~8'x10' concrete pad put in during construction and then left it to weather-season for about a year (a key step!).
Recently we finally had a chance to stick a greenhouse on our well-cured pad. We found some rough plans online (
http://www.buildeazy.com/greenhouse5-1.html) but as we tried to plan out a version based on these plans we rapidly discovered details were a bit lacking for a newbie builder. Despite the fact Eric previously built a house we managed to waste enormous amounts of time and effort on various scenarios that neither of us had never quite run into.
The first barrier we ran into was where to obtain greenhouse poly. Our local Home Depot and the like didn't carry it and seemed to have no idea who might. Luckily while browsing some pictures of greenhouse builds people had done we discovered
http://www.northerngreenhouse.com/. Although not exactly cheap (
prices), the 11mm clear woven poly is a fantastic material. It is light, cuts easily, diffuses light beautifully (this helps avoid burning your plants) and is damn near impossible to tear. Other users gave it rave reviews online so we decided to go with it and ordered a roughly $300 roll (12'x60', price includes tax and shipping).
We don't have a truck so moving 2"x4"x8's and 2"x4"x10's was a bit awkward. Luckily the Subaru Timberline supports about 20 2"x4"x8's per trip.
The next problem was neither of us had ever secured a wooden structure to concrete before. After a quick Google and chat with Home Depot our initial plan was to secure the affair to the pad using
Tapcons. Between using a drill that was too weak (damn you 12v impact driver) and then one that was too strong we wasted literally two days having these cursed things jam, shear off, and otherwise misbehave before mentioning it to a general contractor who suggested that we should use
wedge anchors instead. We rented what Home Depot thinks of as a small concrete drill (shown side-by-side with the 12v impact driver below; lol) and got the job done in 15 minutes. Sigh.
Having finally attached our base to the ground we threw together the first two walls. Rod was fascinated to learn the simple, elegant, and brilliantly effective trick of making the diagonals of a wall the same then adding a cross brace to hold it in place to square the wall. Our work table kept trying to escape so we cleverly trapped it using our new walls. For the verticals we used the remarkably handy
92.25" finger joined studs; these are helpful in that if you put a finished (as in "not rough cut") 2"x4" on top/bottom you get an 8' wall (apparently finished 2"x4"s are actually less than 2"x4" due to the material lost in finishing):
Doubling up the corner supports seemed to add a lot of stability to the previously strong but somewhat elastic structure.
The roof trusses were next up. The plans called for
this but we decided to just go with a simple triangle shape.
At about this time we also decided to invest in a less annoying drill. The 12v is awesome but between inadequate power and having to swap/recharge batteries 4-6x/day it was getting a little irritating for this job. The new drill has
way more power and goes for days between battery swaps. If only we had bought it on day 1!
With the new drill easing the pain we were able to get the trusses on without much issue. Given how much effort we managed to waste on previous steps this was a pleasantly surprising change of pace.
The horizontal between end-trusses makes putting the middle ones on far far easier as well as hopefully providing a convenient mount point for trellises or guide strings or whatever to help future plants reach for the sky.
At about this time one has to ask oneself "how the hell do we get plastic up-and-over this thing". One might then climb a ladder, look around, and think "I don't think I can do it this way but while I'm here I'll paint the outward facing surfaces of the frame white".
Luckily inspiration then struck: if we nail the end of the poly to 2"x4"s we can reach up from the ground!
The poly has to be pulled as taut as possible, then secured by nailing lathe to the studs. For the walls where you can reach from the ground this is awkward but achievable. For the roof we eventually concluded we were going to have to install some temporary scaffolds to facilitate reaching and applying pressure.
With this superb system in place it becomes "trivial" to tautify and lathen.
At the end of the day it could have been tauterer but it is hopefully taut enough to work.
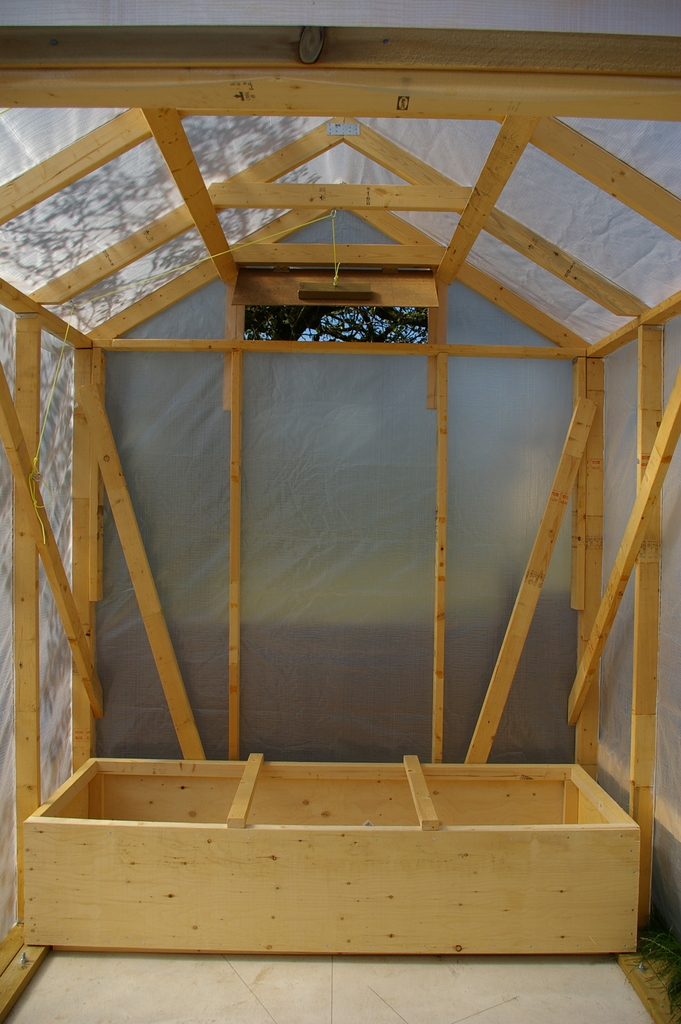
We installed the door, a latch, and the side and front walls then decided to show Pavan the door. She promptly walked in, closed the door, and then asked how to open it from the inside. It dawned on us that had the back wall been completed we would be trapped inside; rofl.
The inside now features an escape string as well as some rigging to open the vent above the door.
The greenhouse seems to work to some extent: it's hot as hell inside. If we had to do it again it would take quite literally 1/4th the time. Still, it was fun to play with something "real" for a while. Next up some sort of planter arrangement and then hopefully years of superior tomatoes!


